

Have you ever wanted to fire an Inbox notification, with all the pertinent data related to the notification right in the message text? Is the “Show Context” button just one too many clicks for your liking? You might already know that you can load an IDO Collection and parse the data row-by-row, but did you know that you can parse the whole resultset at once and spit it out in any format you choose? It turns out that a little-known event action type called Transform XML can do some pretty fabulous things once you know how it works.
Overview
Why?
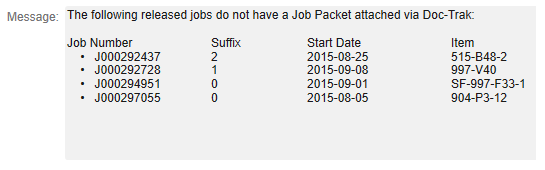
There are a couple places where this could be useful. In this example, I’m building a notification for Job Orders that have been released, but job packets have not been attached through Doc-Trak for them. I needed a way to list all of those jobs without creating yet another report.
Another possibility might be if you want to send an approval prompt when a PO Requisition header exceeds $10,000. This method would allow you to display all of the lines from the PO Requisition on the inbox message itself, so your approver doesn’t need to go digging through the lines to figure out what is being requisitioned.
How to:
This method of displaying data requires 4 steps:
- Loading the IDO collection
- Building the XML
- Transforming/formatting the XML
- Notifying the recipient
Each step maps to a specific Event Action, so we will do these one at a time.
Loading the IDO Collection
Step one is pretty simple, we need to load the IDO collection into a resultset. We do this with the IDO Load Collection event action.
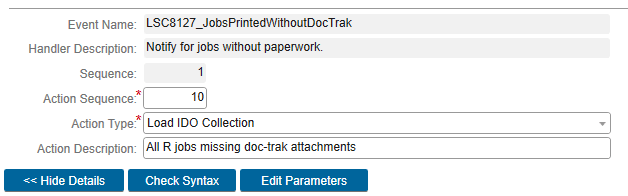
In this example, I am querying a custom IDO I created on top of a view, I am pulling only the properties I need, and I am filtering it specifically for Released jobs. I have also put a record cap in place for safety’s sake.
While this will vary wildly based on what you are trying to do, take note of the Result Set Assignment, since you will definitely need this later.
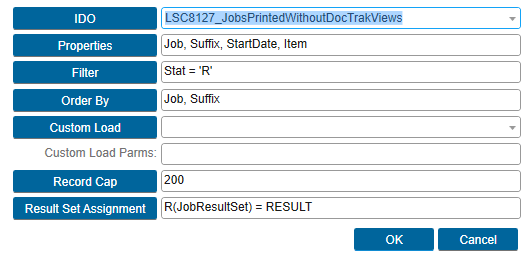
Building the XML
Step two gets a little more complicated. We are going to use the built-in “XML2” function, which takes a specified resultset and spits it out as XML. Here’s what it would look like if we just used the results of this XML function:
XML(JobResultSet, "Element")
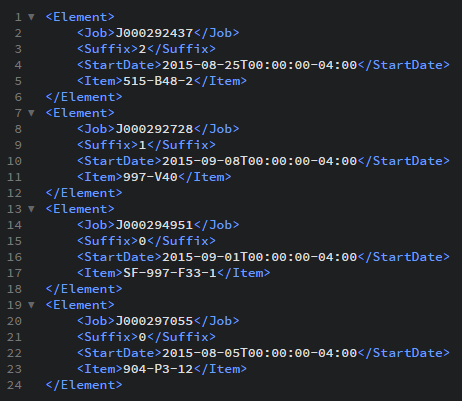
Cleaning up the XML
So this is a good start, but there’s a pretty big problem: there is no root node, only a bunch of “Element” nodes. So our for our next Event Action, we are going to build a variable that not only has our XML, but also adds a root node. Additionally, I’m going to recommend adding a little bit of extra XML to create a header row.
Here’s the Parameters value in text form, so you can copy, paste, and edit the header tags as necessary.
SETVARVALUES(RootedXML = "<root><dataheader>
<dh>Job Number</dh>
<dh>Suffix</dh>
<dh>Start Date</dh>
<dh>Item</dh>
</dataheader>" + XML(JobResultSet, "Element") + "</root>")
This gives us a root node, and some header information. (These tag names are mostly arbitrary, although I am trying to avoid html tags, so WordPress doesn’t eat them.) As you might expect, swap out “JobResultSet” for whatever you created earlier in the “Load IDO Collection” step. You should also edit the <dh> tags to include titles for the properties in the IDO. Just make sure you specify them in the same order you did in the Load IDO Collection step.
All of this has been stuffed in a “RootedXML” variable, so keep that in mind for the next step. (You can change this too, if you don’t like my naming conventions.)
Transforming/Formatting the XML
So now we have a variable, “RootedXML,” which has the following contents:

Now we need to take this and translate it into something that won’t make a user’s eyes bleed. So for that, we need another Event Action: “Transform XML.”
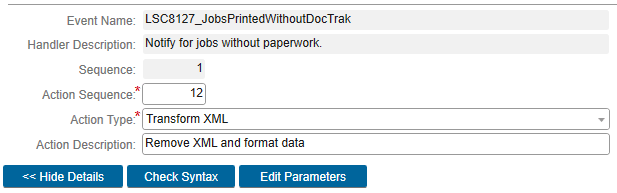
Transform XML
Transform XML has three parameters, an input XML document, an XSLT XML Stylesheet, and a Result XML variable or event parameter, which doesn’t technically need to be XML when you’re done. Technically, this means if you were crazy enough, you could take the XML from an IDO, and transform it into HTML and send it in the body of an email. That would be super cool, and way more work than I want to write up right now.
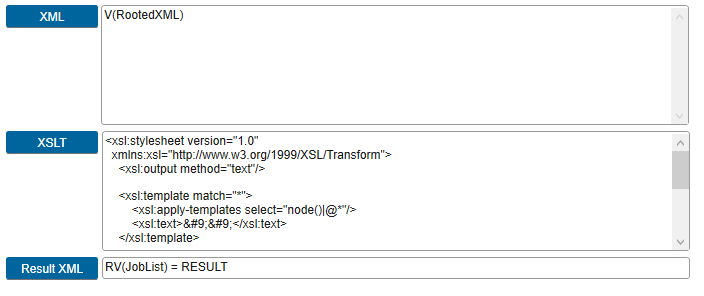
XML Parameter

So let’s start with the easy bit, the XML parameter is just the RootedXML variable we created earlier.
XSLT Parameter

The XSLT parameter is a little more complicated, so let me start by giving you the core XSL that will do most of what you need already. This was modified from a StackOverflow post, so if you use this, go give the original poster some support.
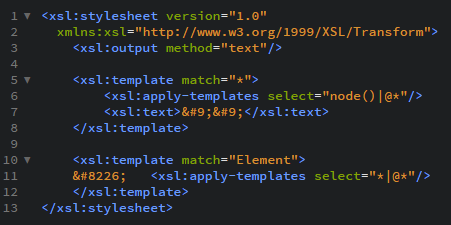
What this does, in order:
- <xsl:stylesheet… /> declares that it is an XSL document
- <xsl:output method:”text”> suppresses the XML declaration (<?xml version=”1.0″ encoding=”UTF-8″?>) in the output.
- <xls:template match=”*”> and <xsl:apply-templates select=”node()|@*”/> means the following template will be applied to all nodes.
- <xsl:text> puts two tab characters after each node. This gives you some extra spacing to make the result more readable. This applies to the header nodes as well.
- <xsl:template match=”Element”> targets the beginning of each Element node, and puts a bullet in front of each row.
Finally, I did have to add one extra template for this event, because the StartDate was in the format 2015-08-25T00:00:00-04:00. I don’t want the time piece, so I added this to the xsl statement:

This picks out any nodes called StartDate, and uses a substring to get the text prior to the “T” in each date.
Result XML Parameter

Finally back to the easy bit. The Result XML parameter allows you to specify either a variable or an event parameter to load the transformed XML into. In this case, I’ve loaded it into a “JobList” variable. We’ll use that in the next step.
Notifying the Recipient
If you know how to send an Inbox notification, you already know how to do this one.
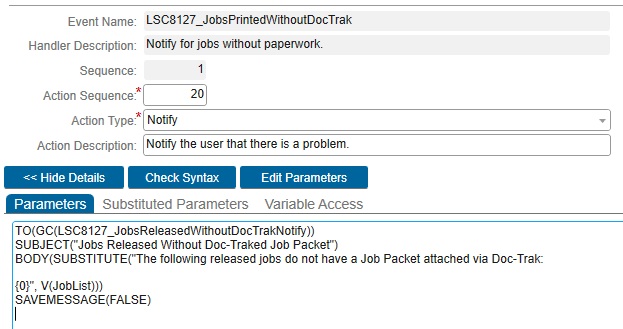 Just use a SUBSTITUTE to drop in the variable you created in the Result XML step previously. I recommend formatting your body so that it places the variable on a new line.
Conclusion
Congratulations! If everything worked out, you should now be able to see the entire contents of an IDO in an inbox message. While this is a little more complicated than simply looping through every row in an IDO and building a string, it does result in less churn in the Event system. As always, there are probably better ways of doing this; if you know of one, please hit that Twitter, LinkedIn, or Mail To button at the top of this blog and let me know!
